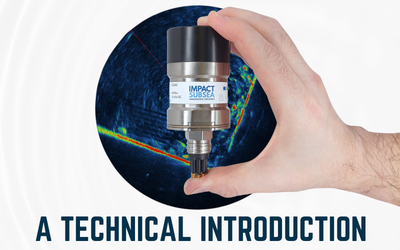
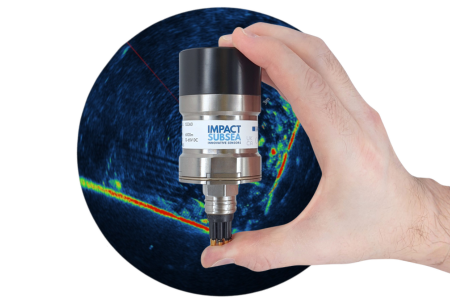
seaView Software V3 provides a cutting-edge user interface for the setup and operation of Impact Subsea sensors.
Transcript
Hi! I’m Ben and in this video we’ll be looking at the ISA500 application in seaView software V3.
When you first run seaView software you’ll be presented with this window here. On the left hand side. You have a list of applications within seaView software. On the right hand side you have a list of all communication ports and network connections on your pc. When you first run seaView software it will automatically scan all communication ports at every known baud rate. It will then automatically detect any sensors connected to your computer.
In this example two sensors have been detected, one is the ISS360 Sonar and the other is the ISA500 Altimeter, as shown in the center of the screen. If you look at the icon for the ISA500 Altimeter, you’ll find you’re given a little bit more information such as the serial number of the sensor, the firmware version and also how it’s connected to the software. In this particular example we can see it’s connected via COM Port 5 at a baud rate of 115,200. If you double click on the ISA500 icon you’ll be taken into the ISA500 application.
seaView Software Application main screen
Now in the application, the top left hand corner shows the distance reading being reported by the ISA500. Every time the sensor pings you will see a green flash of this light here and a distance reading reported. Below the distance reading you also get an energy and correlation value. Also reported is the temperature of the ISA500 internal electronics and if you have an ISA500 with integrated Heading, Pitch and Roll, you’ll also get Heading, Pitch and Roll readings with a little 3D model of the sensor to show you how it’s orientated at any one time.
Acoustics settings
In the middle of the screen you’ve got a graph showing distance measurements over time. The left hand side of the screen you have a number of icons. Now if we start with the top icon, this is the ISA500 settings, so if you enter the settings you’ll be presented with a window like this. The first settings window is all to do with the ISA500 Acoustics.
The ISA500 is a highly configurable altimeter. You can configure many parameters; for example you can change the detection mode you can operate in first detect, strongest or seabed tracking. First detection mode is ideal if you’re working in a confined space where there’s a lot of multi-path, multi-echo capability such as inside a tank. Strongest echo is better for open water activity and if you’re wanting to track the seabed then there’s a seabed tracking option as well.
You can also enable and disable tilt correction, so if you have an ISA500 with integrated AHRS, enabling tilt correction will automatically convert slant ranges into actual altitude so it’ll correct for pitch and roll of your vehicle and give you a more stable altitude reading. You can disable this if you wish and just have pure range readings from the sensor.
You can then configure minimum and maximum ranges, so for your minimum range anything below the set value will never be detected by the ISA500 and your maximum range anything above that value will never be detected by the ISA500 so you can basically gate the ranges that you’re wanting the sensor to look over.
You can also set the frequency. The ISA500 is a broadband altimeter so you can run it anywhere from 400 to 600kHz. You can set the speed of sound to give you an accurate distance reading, you can set the pulse length and the pulse amplitude. You can also put in any distance offsets as required. Moving on to the next settings window the analogue output.
Analogue output
The ISA500 can provide you a serial ASCII output but it can also provide you a scaled output and it can provide a scaled current or it can provide a scaled voltage and you can set up the scaling. So you can set up the start and stop voltages and your minimum and maximum ranges to scale that over.
Echoes
The next setting option is your multiecho setup and this is the number of echoes to be reported on from a single ping. Most applications the ISA500 is used just to give a single range reading but it can also give you multiple range readings from a single ping and you can set how many range readings you want the sensor to report on.
Connection
The next option is your connection so in this window here you can select the serial mode which can be RS232, RS485 or RS485 terminated. You can also set the required baud rate together with the word length, parity and the number of stop bits required.
Output string
The next option is the output string. This is the output string for the distance reading. There’s a number of pre-configured strings and all of which are detailed in the ISA500 manual so you’ve got a number of Impact Subsea strings and you have a number of third-party strings to allow the ISA500 to emulate other altimeters in the market. If the particular string you require is not there you also have the custom button which allows you to create your own ASCII output string in the exact format which you require.
You can also set up in this window what the ISA500 should do if no returns are received whether it outputs a zero reading or a maximum reading and you can also tell it how many times you want it to ping an output to reading anywhere from well a fraction of a second up to up to 100Hz.
You can also set up the interrogation method so if you want to interrogate the ISA500 and command it to ping you can enable that and also set the parameter for it to respond to. You can also select interrogate via TTL if you want to trigger it via TTL and you can select whether it’s the falling edge or the rising edge of the TTL pulse which it triggers on.
AHRS settings
Then if you have an ISA500 which has integrated AHRS you’ll have the AHRS settings option. In here you can configure everything to do with the Heading Pitch and Roll. To start off with you can select the orientation, by default it’s assumed that the ISA500 has the connector pointing upwards and the transducer pointing downwards, however you can change it to be inverted or pitched over or rolled over. And these just set the reference point for your your Pitch, Roll and Heading to make sure you get accurate readings.
Once installed on the vehicle if there’s any inaccuracies and how it’s been installed you can apply minor offsets to the heading pitch and roll. You can also apply a magnetic declination offset enable inertial mode, calibrate the magnetometers and set up your turns counter for the sensor as well.
AHRS output string
The last option to look at here is your AHRS output so this configures the ASCII output string for the heading pitch and roll side of things. And as before the number of Impact Subsea strings and there’s a number of industry standard strings as well. All of which are documented in the ISA500 manual and again as before if there’s a string you require which isn’t there or you want a slightly different string you have the custom option to go in edit a string or create an entirely new string to meet exactly what you require.
Like the altitude or range output you can select how many times per second the string is output. You can also enable interrogation and set up the parameter for the ISA500 to respond to and you can also have the output output on a TTL interrogation as well so that’s all the core ISA500 settings so if we return to the main screen.
If we look at the left hand side again there’s a ping button so you can manually trigger a ping from the sensor and there’s also a ping rate and this sets the ping rate of the sensor when it’s connected to the seaview software so it’s currently set to 1Hz.
We can increase it to 5Hz or 10Hz or we can set the sensor to run at maximum rate. If we set to maximum it’ll basically ping as fast as it can given your minimum maximum range setting. And as we change the ping rate you can see that green light flashes at the designated rate and that basically flashes once per ping on the sensor.
Record log file
At any time you can enable a log file by clicking here and it will record all the ISA500 readings to a log file and time stamp them. You can clear the graph data here if you want to start afresh. You’ve got display options so you can set exactly which parameters you want to be showing on screen. For example you could turn off the temperature we turn off the heading pitch and roll so you’ve just got altitude in the little 3D model for the ISA500, or you can enable all those back on again. Turn on the turns counter, so it will show you the number of turns the ISA500 has made.
Multi-echo output
And the last item I’ll show you here is the multi-echo output capability. If you click show multi-echo it’ll bring up another graph at the bottom of the screen. You can click and make this graph a bit larger and this graph will essentially show you every single return that ISA500 sees from a single pulse being sent out. It gives you a good appreciation of exactly the acoustic environment in which ISA500 finds itself. Or if you want to make multiple measurements to different targets that fall within the six degree conical beam from the ISA500, this is a good way to do it.
ECHOGRAM
Since the above video was created, a new feature was added to seaView. For ISA500 sensors with ECHOGRAM enabled, the ECHOGRAM graph can be shown.
This provides full sonar backscatter data (up to 2,000 samples per ping). A full technical overview of ECHOGRAM can be found here.
Graph options
One other item to consider, on the right hand side of the screen we have a graph options button and this allows you to edit the graph display so you can turn off the fill and you can have it draw points for every ping, can turn off draw lines you can basically alter things to get the exact graph that you want to have on screen.
That’s the ISA500 application in seaView Software V3, if you have any questions regarding this please do not hesitate to contact us at support@impactsubsea.co.uk
Take a look at the ISA500 Product Page: ISA500 Altimeter
Learn more about how our altimeter works in this in-depth technical guide
Watch seaView Software overviews on our other sensors: YouTube playlist