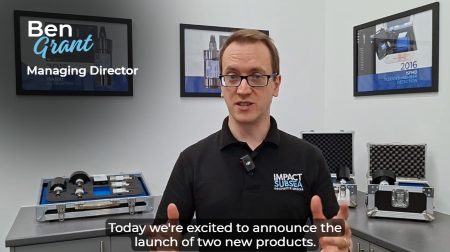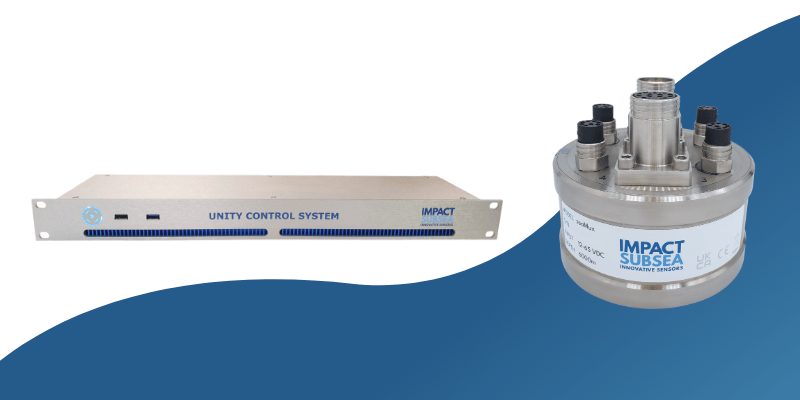
Our latest seaView software overview film features Ben Grant, Managing Director of Impact Subsea, providing a comprehensive guide to setting up your sensor system for ROV operations.
Ben demonstrates how to configure the newly launched seaMux ROV Multiplexer and Unity Topside Control System using seaView Software.
The guide covers how to automatically detect and configure devices within the seaView interface, as well as how to use the software to power sensors directly through the system and configure individual communications ports for RS232, RS485 or Ethernet.
Additionally, the video explains how to bridge data from subsea sensors to topside systems, including passing third-party serial data through the network and how to utilise the built-in monitor tab to track raw data and verify data routing across the entire system.
Whether you’re performing ROV integration or survey suite configuration, Unity & seaMux are designed to provide a robust and high-performance solution to your complex sensor networking.
ROV Multiplexer, seaMux & Control System, Unity – seaView Software Overview Film Transcript
Hi, this video covers the seaView overview of the seaMux subsea ROV multiplexer and the Unity topside control system.
Of note, in order to utilise Unity and seaMux, you’ll need to have seaView 3.2 or newer in order to detect these devices.
For the purposes of demonstration, this overview is conducted on a Unity topside control system connected to a seaMux subsea ROV multiplexer.
If you’re using a seaMux subsea multiplexer on its own, everything will be much the same except you won’t have the Unity portions of this video.
seaView at a glance
So to start things off, when you first turn on Unity, after a minute, it’ll boot into its operating system and it’ll automatically run seaView.
At that point, it’ll find itself and if you have seaMux connected, it’ll automatically detect that. Any sensors connected are shown in this top right kind of area. The devices tab.
On the left hand side, we have an applications tab. This is all the applications that are available within this particular installation of seaView. And generally, you have an application for every one of our sensors. So an application for the altimeter, an application for the depth sensor and so on.
The purpose of this video is not to go through each application individually. You’ll find on the USB drive that comes with any of our sensors on our website or even on YouTube.
We have an application-specific video for every one of those apps.
Before you use any of our sensors, I recommend you watch the application video.
It gives you plenty of information and it talks you through every part of the application including all the sensor setup. So, it’s definitely worthwhile viewing that.
The purpose of this video is mainly to cover the operational side of Unity and seaMux.
So getting on to that, down at the the kind of right hand lower part of the page you’ll find a communications window and this is divided into tabs.
We’ve got a tab for Unity, a tab for seaMux, a tab for System Ports, Serial Over LAN, Networks and Monitor.
Unity Topside Control System
On the left hand side we have Port Names. Now you’ll find each of the ports. Port 1, 2, 3, 4 which corresponds with the four physical ports on the back of the Unity control system. Each has its own line of configuration.
So if we start with Unity Port 1, the next column is Power. You’ll find there’s a power button and clicking the power button on any of the ports will enable a power output from Unity on that port, which is ideal if you’re running a a sensor locally on the bench and you want a way to power it.
The good thing about this is it gives you 24V DC power output and it also tells you the current consumption of whatever is connected to that port.
Now, in this example here, we’ve got a Unity control system with four ports in the back of it, and we don’t actually have any sensors connected to them. So, we’re not seeing any power consumption.
So we’ll start with Unity to kick things off. So, under the Unity tab you’ll find it’s divided into a number of columns.
The next column you have is Bridge. And this is for bridging network ports to other ports. We’ll come back to that a little later on.
Next column is your Serial column. This deals with all serial communications on that particular port. So, to enable communications on port, click the open port button. It’ll open the port and it’ll also tell you how that port is configured, whether it’s configured for RS485 or RS232 and what baud rate it’s been configured to.
If you want to change its configuration, on the right hand side of that particular column, you’ll find a settings button. And under there, you can change the mode of the port. So you can set it to RS232, RS485 or RS485 terminated. The latter is where it puts in a termination resistor and you can also set the baud rate of the port and the priority stop bits and word length. And clicking apply will update that port’s settings. You see it updated there in the green text.
Up at the top there’s a universal search parameter for serial devices. Clicking that will search every port for whatever devices are connected to them. Under each of the ports, you can also do an individual configuration of the ports. You can tell it exactly what it is you want to look for. And you can do an individual discover on each of the ports if you don’t want to do a global discovery. So clicking on that, we can tell it which baud rates you want to search for, whether it’s one particular baud rate or all of them.
You can set the timeout, and the timeout is purely how long it waits for response. So when it searches that port for an Impact Subsea sensor, it’ll wait a certain amount of time to get a response from that sensor. 250 milliseconds is usually okay. But if you’re running a particularly complex system, maybe you’re running from the sensor to the topside, you’re running it through several converters, different physical media, and there might be a few things that introduce latency into your communications. In which case, upping that time out to 500 milliseconds or even up to 10 seconds if if you need a really long timeout will let you search for and find the sensors.
You can then set up what the port search is actually looking for. Whether it’s looking for Impact Subsea sensors or whether it’s looking for NMEA devices.
Examples of NMEA devices it might be looking for is the likes of a GPS input. For now we’ll just assume we’re looking for sensors.
So if you’re looking for an Impact Subsea sensor, you can tell it the particular type of sensor you’re looking for or you can leave it set to any. You can also tell the serial number of the sensor that you’re looking for or you can just leave that blank.
Generally speaking, you don’t need to set device type or serial number or configure a specific baud rate. You can leave it all quite open and it’ll do an automatic discovery and it’ll find whatever is on that port.
The only time you might want to put serial numbers in is if you’re doing RS485 multi-drop and you’ve got multiple sensors all connected over the same RS485 bus, they’re all connected to the same physical screened twisted pair. In that case, you need to tell seaView each device that’s connected to it.
And so if you have three altimeters for example and one RS485 bus you put in the serial number of the first altimeter, click Discover, then put in the serial number of the second altimeter, click Discover and then the third altimeter, click Discover and that allows the three altimeters to be discovered one at a time.
Once seaView knows that they are on that RS485 bus, it’ll automatically hold them there and it will handle the communications over that RS485 bus for you. And then at the very end there’s a network side of it as well. So the network side handles anything connected via Ethernet essentially.
So you’ve got a a serial configuration looking for serial items on the port and network configuration looking for network items. So that is all your setup for the the Unity ports.
seaMux ROV Multiplexer
Then if we jump on to the seaMux tab, you’ll find it looks very similar. If we go back to Unity one again, you’ll find the tabs are almost identical. That’s because Unity and seaMux have very similar hardware inside. Both of them have four communication ports. And those four communication ports can all be powered.
They can all be RS232 comms, can all be RS485 comms, and they can all be Ethernet comms. So, in terms of functionality, it’s a very similar setup for the subsea side as it is to the the topside.
So in this particular example we have seaMux running just now and we have a number of sensors connected to it. So again, we’ve got the the port names. This time they’re called seaMux Port 1, 2, 3, 4 and that corresponds with the four 8-pin subcon connectors on seaMux which also have 1, 2, 3, 4 written next to them. So you can physically identify the ports quite easily.
To turn on power to those ports we click the power button. That’ll enable 24V DC output to the sensors. And we can also see that we’ve got current draw on those four ports of varying amounts. That gives a good indication that we’ve got something connected to that port and it’s drawing current.
Bridge Function
Next, we have the bridge function. I’ll touch on this briefly just now. So bridging is really useful. Possibly not so much with Impact Subsea sensors connected, but it is really useful if you’ve got a third-party serial device connected. So a sensor that’s maybe not an Impact Subsea sensor, but it’s outputting serial data and you want to get that into seaMux up through the telemetry into Unity, then you want to get it out of Unity and into a third-party system. In that case, bridging is really useful.
So to bridge a port, say we had a third-party sensor connected to seaMux Port 2. We go along to Bridge, click, select Bridge. There we can then bridge it straight across to any of the Unity ports. So in the back of Unity, we’ve got the four ports in the topside. So we could say, for example, everything coming into seaMux Port 2, I want to bridge across to Unity Port 1. And that’s it now bridged.
So any serial data coming into seaMux Port 2 will be bridged to Unity Port 1 and be available directly out of that port for onward passing the third-party system. Nice and simple.
Now, if you happen to be utilizing seaMux with quite a lot of third-party items, that’s how you set up bridging. Just go to the port, so Port 4, for example, you could say go bridge that Unity Port 3. And then you’ve set up that bridging there.
If you want to remove it, just click the red X and the bridge is broken and the port can now be reassigned.
Of note, the bridging function is only available when you’ve got seaMux and Unity. If you’re running seaMux on its own without Unity topside, the bridging function is not there. So, if you’re trying to get bridging to work on a standalone PC, you’ll find it’s not possible.
Serial Setup
The next column is the the Serial Setup and again, it is exactly the same as Unity. You can enable the serial ports. You can see how the serial ports are set up.
This is also up for RS232. If we had RS485 multi-drop, just simply click on the port you want to change to RS485. Change it to RS485. Click Apply. That’s it up and running. I’ll put this back to RS232 just now because I know all the devices we have connected are RS232 today.
And then you’ve got the network. And it’s actually showing up that we have a network connection on seaMux Port 1 and 3 already. It’s identified that. So it’s likely we’ve got two devices that are communicating over our network there. You can do a network search by clicking this button here, or you can do a serial search by clicking this button here.
We do a network search first. Click there. We can see the devices on the network. So, we’ve got two sonar devices. We’ve got a profiling sonar, an ISP360, and we’ve got an imaging sonar, an ISS360HD.
And if we want to search for the serial, then we’ll go in and click Search Serial. And that shows us all the serial devices connected. So now we’ve got an altimeter connected over serial on seaMux Port 4 and a depth sensor connected to seaMux Port 2.
If you do want to do a global search, there’s this button here. It searches all ports. So it searches serial and it searches network at the same time.
If you are using that, just be aware some devices which have Ethernet and serial, such as the sonars, if it picks up on serial first, it’ll connect to them over serial rather than Ethernet. So sometimes it’s better to search for the network first, get your network sensors and then search for serial. When it comes to the sonars, the profilers and sonars, ideally you want to be connected over Ethernet as that will give you the fastest data transfer from those devices.
And at this point, we’ve got basically everything connected. So we’ve got Unity, it’s connected to the seaMux subsea. We’ve got a profiler and imaging sonar connected and a depth sensor.
And to use any of these devices, we simply double-click on a device and it will launch that device’s application. I can jump back to the Devices page, go through all the devices one at a time, get their applications up and running. And now I’ve got all those applications up and running, and they’re up and running in in tabs.
If I want to put them all together, you can click the the tile view and that just drops all the sensors onto one page and you can move those sensors around and you can drag and drop things and resize things to your heart’s content, really, until you get all the the sensors displayed just as you like them for your particular application.
Again, this software overview video is not really to go through all of the individual applications. So, it’s really just covering the use of Unity and seaMux and how to get things up and running and how to use these two devices.
So, going back down to the the Comms tab, the lower right-hand side, we’ve gone through the Unity setup. We’ve gone through the seaMux setup.
The next tab you’ve got is System Ports. So, this will show you any items connected to Unity or if you’re running the software on PC, it’ll show anything connected to a PC. So if you’ve got anything like a USB to serial converter, it’ll show up in here.
Serial Over LAN
Next, you’ve got Serial Over LAN. So Serial Over LAN is quite a powerful feature. So we can set up serial data to go over a network. It’s very quick and easy to do. You click this button here to add a new port. You set up the IP address for the data, the port number, protocol, and encoding. Click Add, and then that port is now set up.
It’s established. And we can use that port to output data to or bridge it to any of the the Unity or seaMux ports that’s now available on the system.
Network
Something else you can do is the Network tab. If you click on Network tab, it’ll show you the networks that are physically connected to your computer or, in this case, Unity. And in terms of Unity, we have two networks connected. The lower one, the Unity Sensor Network. That network is all about the sensors that are connected to the seaMux and then up from the seaMux into the sensor network port on the back of Unity.
The second network is the Local Area Network, which has a second physical port on Unity and allows connection to any local network you have. So a ship network or a survey network, anywhere you want to get data over, that’s the port to use.
Monitor
The last tab we have is Monitor. Now Monitor is a really useful feature, particularly if you’re routing data around the system and you want to monitor that data and see where it’s at.
This is particularly useful if you’ve got third-party devices. So maybe you’ve got a third-party serial device. It’s outprinting some ASCII data. You’ve got it into one of the ports in seaMux and you’ve routed it to a port on Unity.
You can use the Monitor tab to monitor the data coming into the seaMux port and then you can check it again on the Unity port. So you can see the raw data coming in, you can see the data going out. You can track the data through the whole part of the system.
Now to give you an example of that, what we’ll do is we’ll use the ISA500 that’s connected to seaView currently. So the ISA500, when it connects to seaView, it talks to seaView with a a binary protocol, as do all of our sensors. And if you disconnect it from seaView, it stops talking to seaView. It’ll go back just to outputting standard ASCII data. So we’ll do that.
So the ISA500, you’ve got its device tile here. Device tile, by the way, is really useful. It shows you the serial number. It shows you the firmware version of that sensor and also tells you how it’s connected. So we can see this ISA500 altimeter is connected to seaMux Port 4 via RS232 serial communications and it’s at 115200 baud rate.
And if we want to disconnect it from seaView, the seaView effectively forgets about it. We just click the Delete button. That gets rid of the ISA500. It’s now not talking to seaView. After a few seconds of that, the ISA500 will stop trying to talk to seaView and it’ll go back to outputting ASCII data.
So it’s still connected to seaMux Port 4. So if we go into seaMux Port 4, you can see it’s still powered, it’s drawing currents, the altimeter is there, it’s just not talking to seaView.
So now, if we go into Monitor and you can select any port on the system. So you can select any of the seaMux ports. You can select any of the Unity ports. Even the Serial Over LAN port we’ve created. We can select that to see what we’re putting out that port there. But if we go to seaMux Port 4. Yeah, let’s do that. Let’s go monitor it. So there we go.
We can see the ASCII data coming out from that ISA500. You can see the burst of data coming through from it. Pause that. Now, what we could do here is, we’ve got that data coming into seaMux Port 4. So, what we could actually do is go to seaMux Port 4. Let’s go route that somewhere. Let’s go put that onto Unity Port 1. That’s now bridged. So all that ASCII data coming from the altimeter connected to seaMux Port 4 is now bridged to Unity Port 1.
So if we go back into Monitor and this time, well, we can play it again. We can see the data coming in on seaMux Port 4. Yeah, it’s coming in there. We’ve bridged it to Port 1 on Unity.
So go to Unity Port 1, hit play there, and we can see the data going out on Unity Port 1 as I transmit. So again, let’s pause that. Let’s go back to seaMux Port 4, play. You see it’s all RX data. So seaMux Port 4 is receiving that data. It’s coming into that port. And if we go back to Unity Port 1, you see it’s all TX data.
So it’s all data being transmitted out of Unity Port 1. So we can see that the the bridge we’ve set up from seaMux Port 4 to Unity Port 1 is fully functional. Data is coming in, it’s going out as we’d expect. So it’s really useful for just checking on data, making sure it’s going where you want it to go and it’s all good.
So yeah, that’s a complete overview of the seaMux and Unity and how you use them in seaView V3.2 or above. For any of our other sensors, check out our Products Page, Unity Topside Control System or seaMux ROV Multiplexer pages.