ROV / AUV Altimeter – ISA500 Live Question & Answer Session.
Transcript
Hello and welcome to this week’s live session here on YouTube from Impact Subsea, I’m Ben Grant, Managing Director.
Introduction to ROV / AUV Altimeter – ISA500
This week I’ll be answering your questions on any of our sensors or software. This week we’re going to focus on looking at our range of underwater altimeters which is the ISA500 range.
Which ROV / AUV Altimeter is right for me?
One of the questions we often get asked by people first approaching us to learn more about the ISA500 altimeter is; ‘Which altimeter is right for me?’
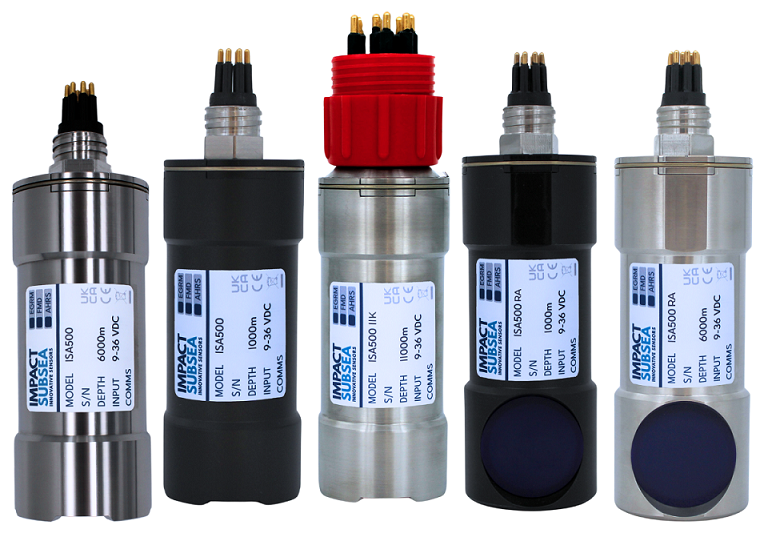
In the ISA500 range we have around about 11 different configurations of altimeter so this range is different housing materials, different housing configurations and some without housings at all. What I’ll do initially is just talk you through some of the options that are available.
What does the forward looking, titanium altimeter look like?
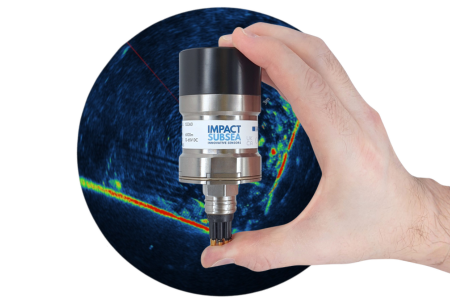
One of the altimeters, this is the ISA500 in titanium and we refer to this as the forward-looking housing as the transducer looks straight out the end of it and this is the first model we launched back in 2015 and since then we’ve added additional models to the range.
The ISA500 in titanium, forward looking has the capability to measure up to 120 meters away from the seabed. Depending on the the seabed type you may actually get a longer range than this. We’ve had up to 175 meters when we have a rocky seabed which is a really good acoustic reflector to get long range measurement capability and you also get a very high degree of accuracy.
The ISA500 itself actually resolves range to 0.7 millimeters then rounds up the nearest millimeter. There’s a little example in the background here running.
We’ve got an ISA500 in our test tank just here, measuring distance here so you can see the distance being measured on the screen there. It’s measuring about 0.628 meters and so you can see the last digit there, that’s the millimeter value and you see it’s very stable very accurate.
As the altimeter is moved just slightly you’ll see that value change up and back down towards the base of our tank. The ISA500 provides long-range capability and very high degree of accuracy as well.
Optionally integrated into the altimeter is heading pitch and roll and so you can see that being fed out here, we’re heading to magnetic north and pitch and roll as well so it’s a magnetic north that’s accurate plus or minus half a degree and the pitch and roll is accurate to 0.2 degrees.
What does the right angled, titanium altimeter look like?
That’s the ISA500 in titanium, forward looking. We also do the same sensor, the same capabilities in terms of range and accuracy in what we call the right-angled housing configuration. Essentially instead of having the transducer pointing forward it points out to the side. This is quite a useful configuration if you want to put the ISA500 altimeter into a slimline form factor vehicle such as an AUV or if you want to put it onto a towed tool or towed sensor such as a magnetometer and it’s the right kind of profile to fit within the nose cone and point down to the seabed and give you range.
What does the plastic altimeter look like?
Then we also do the altimeter ISA500, in acetal plastic and forward-looking configuration and acetal plastic, right-angled configuration. The dimensions and capabilities in terms of range and accuracy are exactly the same as the titanium counterparts, the only things that change are the weight gets a little bit lighter in the plastic and also the depth rating.
The titanium sensors as standard, are depth rated to 6,000 meters, in acetal plastic they’re depth rated to 1,000 meters so still more than sufficient for a lot of shallow water application work.
Can I integrate the transducer into my ROV / AUV? (OEM Option)
If you want an altimeter solution, potentially for an AUV, where you don’t want to have a full housing, maybe you want to integrate the transducer into the body of the AUV and the electronics into your electronics pod?
We do also offer the ISA500 OEM option which is a single board PCB which has all the capability on it and a transducer which connects on the end or you can disconnect the two and you have the transducer separate from the PCB, simply connect the two with a piece of coaxial cable if you want to have a PCB mounted in a separate location to the transducer so it’s not always convenient to have the PCB immediately behind the transducer.
The OEM option is nice and simple it comes with a terminal block on it which you can wire straight into and that comes with all the details of which pins are for power and which are for comms. It’s very quick and easy to get set up.
How can I show the altimeter outputs?
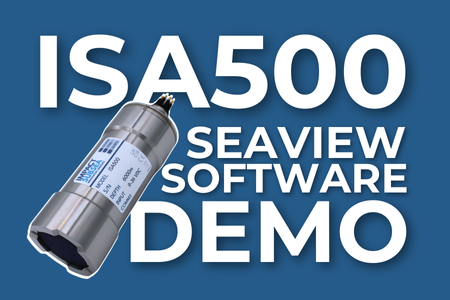
So when it comes to the ROV / AUV Altimeter ISA500 that’s the hardware, there’s a number of different configurations as we’ve seen. We also provide the seaView software. seaView provides the ability to show all the outputs of the ISA500 in real time so again your distance reading, you’re heading, pitch and roll.
Can I use this altimeter for asset deployment?
We also integrated a turns counter so we can sense the number of rotations that the ISA500 has completed. If I take this ISA500 from the tank and just rotate it a little bit there, you can see the turns counter starts to count up and if I take it the other way it counts back down again. That can be useful for certain applications, if you’re doing asset deployment and you want to monitor turns, twists in your umbilical, it’s a good way to monitor that.
How do I know the reading is accurate?
I mentioned the ISA500 outputs range so it does a measurement; long distance, high accuracy. It can also output energy and correlation values for each reading it takes.
On the screen we show that as a colour bar chart. You can see that bar chart moving slightly with the altimeter pings, the yellow proportion of the bar chart is the energy that’s been received back to the ROV / AUV Altimeter – ISA500 from the energy it’s sent out into the water and the green proportion of that is how much of that energy correlates really nicely.
How much of it is a nice clean sign wave coming back and how much of it has distortion on it. This can be used, or thought of, as a trust factor for the distance reading. If you get a distance reading like this and you’ve got a lot of energy coming back, it’s quite a long yellow bar and most of it is green, there’s a high probability that that’s a very good reading.
It’s a really nice clean signal coming back the ROV / AUV Altimeter – ISA500 is certain, confident that the reading is correct. If you get a reading back where the yellow bar is very short, it would indicate only a small amount of energy has come back or if you get a reading back where the green bar is quite short, it suggests very noisy readings come back and if you get one where it’s low energy and low correlation it suggests it’s a bad reading, one that should have a low trust factor applied to it.
It gives you a little bit more knowledge than just pure distance reading.
Can I see the software provide a graph of readings over time?
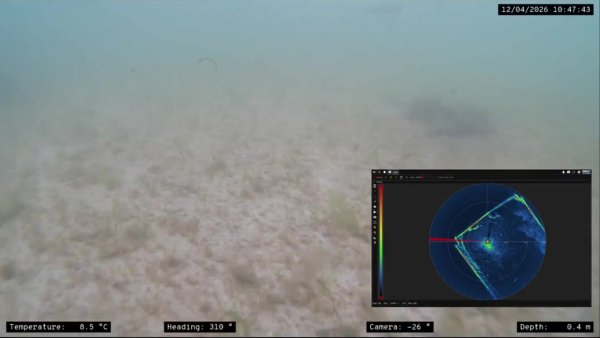
On screen here we’ve just got a plot of each distance over time so if we move the ROV / AUV Altimeter – ISA500 up in the water you can see that change on the graph. Move it down again you can see it on the graph like that. It just tracks the readings over time.
Does the ROV / AUV Altimeter take a multi echo output?
In seaView we provide you with a multi echo output so you can click on this little multi echo button here and pull up a separate graph. This graph here will show you every echo the ISA500 hears going back across the range it sends a single ping out into the water and it listens to what comes back. A lot of the time, if you’re in open water you’ll send a ping out into the water, it will travel, hit the seabed and come back again you just get one single return.
If on the other hand, you’re operating in a small test tank like we are today it sends one ping out then that ping then bounces hits the base of the tank bounces back, hit’s the top of the water, bounce back to base again, it sits there bouncing back and forth and for that reason the ISA500 ends up seeing a whole series of echoes going back.
How do you set up the ROV / AUV Altimeter software?
That’s the basic seaView software you can also set the seaView up to log data, save it to a CSV file or output the data to a comm port for feeding into a third-party package or if you don’t want to use seaView at all, you can use seaView just to configure the ISA500 and output the ASCII data that you require.
To give you a little example ISA500 is fully software configurable, there’s no dip switches, there’s nothing inside the unit to physically adjust, everything is done in the software. When you first go into the settings you’ve got the acoustics setup page and from here you can set your frequency so you can write anywhere from 400 to 600 kilohertz. It’s a fairly consistent performance across that band, it’s quite a wide bandwidth ISA500 altimeter.
500 kilohertz is the default that we set it to but you can move it away from there. If you’re running it alongside another acoustic system, maybe a sonar system that’s in a similar kind of frequency range you can move the altimeter just out of that frequency range to avoid any interference.
You can also set your speed of sound, if you’re working in fresh water or salt water or if you’re working on another medium such as a hydrocarbon you can adjust the speed of sound to ensure that your readings are all accurate. You can adjust your pulse amplitude anywhere from one to 100 percent you’ll just adjust the volume of amount of energy the altimeter puts into the water.
You can also adjust your pulse length and by default we have the ROV / AUV Altimeter – ISA500 set to a pulse length of 200 microseconds. This works really well from a range of about 30 centimeters up to 120 meters but in certain situations maybe if you want to get really close range measurements from the ISA500 down to about 10 centimeters away from the transducer you can drop the pulse length down to allow it to get a little bit closer to the target you’re measuring.
You can also gate the responses so you can set your minimum range and maximum range so if there’s a set distance that you’re interested in you configure it there.
What is tilt correction?
We also have tilt correction so if you’ve got an ROV / AUV Altimeter – ISA500 with integrated AHRS providing heading, pitch and roll, you can turn on tilt correction and what that will do is automatically correct your slant ranges. If you’ve got the altimeter on your underwater vehicle and the vehicle is pitching and rolling as the altimeter is sending out pings it’s actually taking slant range measurements so it’s not actually giving you true altitude, it’s just giving you the slant range measurement.
If you turn on tilt correction it will take into account the angle the ISA500 is sitting at, it’ll automatically work out what is the actual altitude so you can have the altimeter you can move it like this in the water it’ll sit there and give you a very constant altitude input which is great if you want an auto altitude system on your vehicle, you want a really stable input to that.
Does suspended sediment interfere with the altimeter and its ability to get readings?
The last item you can change on the acoustic side is your detection mode. On the detection mode we have several options, the two main ones being; first echo and strongest echo.
First echo works by transmitting a pulse of sound and as soon as it hears any return coming back it’ll use that trigger on and give you a range reading. That works really well in enclosed spaces such as tanks that we have here today.
The other option is strongest echo so if you select strongest echo the ISA500 will send out an acoustic pulse, it’ll listen to every single echo that comes back again and it’ll select one of the highest amplitudes and use that to lock on and give you a range measurement. This is really useful for open water, if you’re working in the sea or in a lake then this is ideal. Using the strongest echo method we’ll send out the ping, it may get smaller returns from fish.
It will then ignore all the smaller returns, focus on the seabed and give you that range reading. Using the strongest echo detection method ensures great stability when you’re in open water.
That’s about everything on the acoustic side. You can also set up an analog output if you want a scale voltage to be output from the ISA500 relative to the ranges measured and set this up there. You can set up multi-echo outputs so if you want the ISA500 to output more than just a single reading, you want it to output every single echo that it hears going back for the first 10 echoes or the first five echoes, you can configure that here.
The connection, you can configure it for 232485 or 485 terminated and you can set the baud rate and we get down to the output.
How easy is it for me to replace another altimeter on my ROV?
These are the standard ASCII output strings for the ISA500 altimeter has saved in its firmware. These are all details in the manual if you want a break down of exactly what’s in the string.
We’ve got all kinds of common, industry standard strings there and it means that if you’re replacing another altimeter in your vehicle you can quickly set the ISA500 up to emulate its output. There’s no engineering effort on your side, it’s just a plug-and-play solution.
You can also set up all the AHRS settings. You can set up the orientation the ROV / AUV Altimeter – ISA500 so it knows where to take the heading, pitch and roll readings relative to. I can also put any offsets in there, it’s got the ability to set up the output for the AHRS side of things as well so if you want to output an ASCII string with heading, pitch and roll it’s really quick and easy to set up.
That’s a quick run through of the ROV / AUV Altimeter – ISA500 and the seaView software which supports the ISA500 sensor itself.
If you want to learn more about the ISA500 then our website has an ROV / AUV Altimeter – ISA500 page under the product section which talks you through all the technical capabilities.
We also have several articles which go through all the technical side of the ISA500 in more detail than I’ve gone through here today.
If you have any other questions, at any time, feel free to drop us an email at support@impactsubsea.co.uk or give us a call.
That’s all for this week, thank you.
► OUR PRODUCTS ◄
► SUBSCRIBE ◄
► LETS CONNECT: ◄
► GET IN TOUCH ◄
EMAIL: info@impactsubsea.co.uk
PHONE: +44 (0)1224 460 850
Monday – Friday, 9AM – 5PM GMT